
15 Simple Yet Beautiful Laser Engraving Ideas For Beginners
Introduction
The options in laser engraving can be confusing to a newbie. The process of utilizing a laser beam to etch or engrave designs onto a variety of materials is known as laser engraving. It's a flexible and accurate process that may be utilized to produce beautiful works of art and unique items.
In this post, we'll look at 15 beginner-friendly laser engraving ideas that are both straightforward and lovely. These suggestions will include everything from custom keychains to engraved wooden signs, and each project will provide step-by-step instructions and useful hints for producing outcomes that look good. These concepts will motivate you to get imaginative and begin engraving, whether you want to make utilitarian items or ornamental items. So let's get started!
Learning the Basics of Laser Engraving
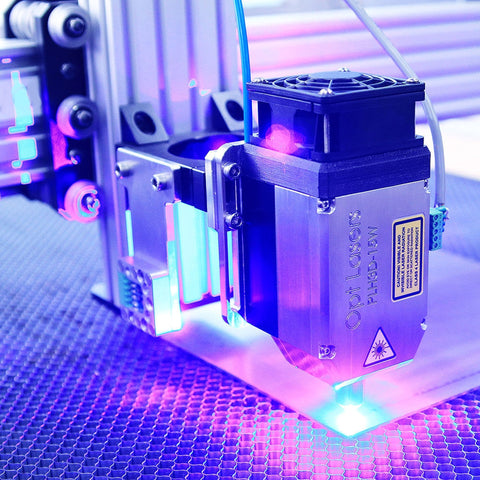
Selecting an appropriate laser engraver
- Examine the capabilities of the various types of laser engravers (CO2, fiber, and diode).
- Consider your budget and the magnitude of the projects you intend to work on.
- Look for a respected brand with positive customer ratings and technical assistance.
- Choose the option that best suits your requirements. To decide between a desktop and a handheld laser engraver, consider your workspace and mobility needs.
Being aware of the fundamental methods and security measures
- Read the user guide and safety precautions for the laser engraver.
- Recognize the effects of various laser power settings on various materials.
- Use sufficient ventilation in your workplace to get rid of smoke and smells
- When using the engraver, put on the proper personal protective equipment, such as gloves and safety glasses.
Choosing the right engraving materials
- Wood: For the greatest engraving results, select hardwoods like maple or birch.
- Acrylic: Select cast acrylic sheets in a range of hues and densities.
- Glass: To avoid using leaded glass while engraving, use tempered glass or borosilicate glass instead.
- Leather: While synthetic leather may yield inconsistent results, genuine leather works great for engraving
- Metal: When laser engraving, think about using metals like stainless steel, aluminum, or anodized aluminum.
- Paper and cardboard: Opt for high-quality, uncoated paper or cardboard.
- Plastics: Check for compatibility before engraving certain plastics, such as ABS or polycarbonate.
You'll be ready to start your engraving journey if you have a fundamental understanding of laser engraving, the appropriate tools, and appropriate materials. As you explore different materials and emphasize safety measures, keep in mind that you can unleash your creativity.
Idea 1: Customized Keychains
Supplies required
- A laser cutter
- Keychain blanks (made of wood, metal, acrylic, etc.)
- Design applications (like CorelDRAW or Adobe Illustrator)
- Safety gear (gloves, safety glasses)
- Decorative accents like beads, charms, or tassels are optional.
A step-by-step tutorial for making a custom keychain
- Pick a keychain blank made of the material that best fits your design (for example, metal for a sleek appearance or wood for a rustic feel).
- In the design software, measure and establish the size of your keychain design.
- Draw the image you wish to engrave on the keychain yourself or import it.
- Set up your laser engraver using the settings and material that the manufacturer suggests.
- Ensure that the keychain blank is centered and sturdy before firmly fastening it to the engraving machine's bed.
- Use the engraving program to preview and position the design on the blank keychain.
- Begin the engraving procedure and keep a close eye on it to make sure the laser produces a clear and accurate engraving.
- After the engraving is finished, take the blank keychain from the engraver and, if required, let it cool.
- Using jump rings or adhesive, attach any additional ornamental components, such as beads or charms, to the keychain.
Suggestions for incorporating originality
- To make the keychain unique, experiment with different fonts, monograms, or initials.
- Take into account including significant symbols, sayings, or pictures that represent the recipient's preferences or character.
- To make the design stand out, choose contrasting colors for the engraving (for example, black engraving on light-colored keychain blanks).
- Combine various materials to get a layered or textured effect, such as wood and acrylic.
- To add visual appeal, experiment with the keychain blank's various shapes, such as rectangles, circles, or custom shapes.
- To increase the engraved keychain's longevity and brilliance, think about adding a clear lacquer or resin finish.
- Pay close attention to the little things and make sure the keychain is well-finished with no rough or protruding edges.
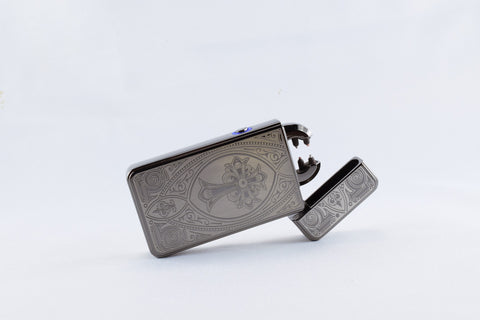
For different events like birthdays, graduations, or as marks of appreciation, personalized keychains make wonderful gifts. With the correct supplies, tools, and a little imagination, you can use laser engraving to make beautiful and significant keychains.
![]()
Idea 2: Personalized Wood Coasters
Supplies required
- A laser cutter
- Blank wooden coasters made of hardwood, bamboo, or cork
- Design applications (like CorelDRAW and Adobe Illustrator)
- Safety gear (gloves, safety glasses)
- A sanding block or piece of paper (optional)
Detailed instructions for etching wooden coasters
- Decide which kind of wooden coaster blank best suits your preferences and design.
- Measure the dimensions of your coaster design and input them into the design program.
- Draw the image you wish to engrave on the coaster yourself or import it.
- Configure your laser engraver using the settings that are suggested for the type of wood you have selected.
- If necessary, lightly sand the wooden coaster blanks to create a smooth surface.
- Ensure that the wooden coaster blank is level and stable before securing it to the engraving bed.
- Use the engraving software to preview and reposition the design on the coaster.
- Start the engraving procedure and watch the laser carefully to get the depth and detail you want.
- After the engraving is finished, take the blank coaster from the engraver and check the engraving's quality.
- To improve the finish, you may want to lightly sand the coaster's edges or surface.
- To protect the wood and increase the coaster's endurance, apply a protective coating, such as varnish or food-grade sealant.
Design hints for distinctive and fashionable coasters
- To create an eye-catching impact, experiment with elaborate patterns, geometric forms, or mandala designs.
- To create a rustic or botanical feel, incorporate items that are influenced by nature, such as leaves, flowers, or wildlife.
- To achieve a variety of textures and aesthetics, experiment with various wood types, grains, and finishes.
- For a meaningful touch, think about adding initials, names, or special dates to the coasters.
- To give depth and visual intrigue, use contrasting colors or engrave a mix of filled and outline designs.
- Make a collection of coasters with an overarching theme or series, such as various sayings, places, or aesthetic movements.
- For a distinctive appearance, use negative space by engraving around the design while leaving the center or border unaltered.
- Add comedy, sayings, or amusing images to the coasters to make them conversation starters.
- Experiment with other engraving techniques to add shading or gradients to your creations, such as grayscale or halftone.
Customized wooden coasters are not only useful, but they also add a fashionable touch to companies or homes. You can make one-of-a-kind, personalized coasters that will wow guests by using these methods and creative advice. Have fun experimenting with the possibilities and let your imagination shine through the laser-engraved images on the hardwood coasters.
Unlock Your Creative Potential with the Best Laser Engravers of 2023 - Available Exclusively at GearBerry! >>>
Idea 3: Glassware with engravings
Supplies required
- A laser cutter
- Glassware (such as tumblers, beer mugs, and wine glasses)
- Design applications (like CorelDRAW and Adobe Illustrator)
- Safety gear (gloves, safety glasses)
- Optional: transfer tape, masking tape, and isopropyl alcohol
Glass engraving techniques
- Clean the glasses well with isopropyl alcohol to get rid of any oils or residues.
- Using design software, determine the shape and size of the pattern on the glassware.
- Make sure the design you want to engrave on the glassware fits inside the designated area and create or import it.
- Configure your laser engraver using the settings advised for engraving glass.
- Before inserting anything into the laser engraving machine, make sure that the glassware is stable and level. This will help to ensure accurate and precise results from the laser engraving machine.
- Use the engraving program to preview and reposition the design on the glassware.
- Start the engraving procedure and watch the laser closely to get the engraving's desired depth and clarity.
- Take the glassware out of the engraver after the engraving is finished, then check the engraving's quality.
- To remove any debris or residue left behind from the engraving procedure, clean the glassware once more.
Concepts for individualized glassware designs
- Initials or monograms: For a timeless and unique touch, engrave the recipient's monogram or initials.
- Quotes or messages: Emblazon the glassware with thought-provoking quotations, motivational sayings, or hilarious expressions.
- Names and dates: Mark significant anniversaries or wedding dates as well as other names to commemorate memorable occasions.
- Create distinctive drawings, such as pictures of a beloved animal, a sports team's logo, or logos that are tied to a passion.
- Silhouettes or outlines: For a contemporary appearance, engrave classy silhouettes or outlines of items, scenery, or city skylines.
- Signature or handwriting: For an emotional touch, engrave a loved one's signature or handwritten note onto the glassware.
- Geometric patterns: To create a modern and eye-catching design, use geometric forms and patterns.
- Faux etching: Play around with patterns that simulate the appearance of classic etching, like delicate floral motifs or elaborate borders.
- Coordinate engravings: For a special and significant design, engrave the coordinates of a special site, such as a wedding venue or a treasured place.
Glassware with engravings provides for tasteful and distinctive gifts or can spruce up your own collection. By using the techniques and experimenting with different design concepts, you can use laser engraving to make beautiful and unique glassware.
Idea 4: Personalized phone cases
Supplies required
- A laser cutter
- A phone case that may be engraved with.
- Design applications (like CorelDRAW and Adobe Illustrator)
- Safety gear (gloves, safety glasses)
How to engrave a phone case, part B
- Decide on a phone case that works with your laser cutter.
- After measuring the phone case's measurements, make a design template in the design program.
- Create or import the artwork for the phone case that will be engraved.
- Configure your laser engraver using the parameters advised for the phone case's material.
- Make sure the phone case is suitably positioned and insert it into the engraving machine.
- Use the engraving program to preview and modify the design's position and size.
- Start the engraving procedure and closely monitor it to get the depth and level of detail you want.
- After the engraving is finished, take the phone case out of the engraving machine and check the engraving's quality.
- Remove any debris or ink left over from the engraving process by cleaning the phone case.
- Put the phone case on your phone and take a look at your unique design.
Ideas for producing designs that seem good
- Simplify the design: Choose simple, minimalist styles that make the most of the small space on a phone case.
- Play with the negative space: To provide contrast and aesthetic appeal, use both etched and unengraved sections.
- Play around with textures: Engrave patterns or textures to give the phone case dimension and a pleasing tactile feel.
- Add unique details: Personalize the phone case with initials, names, or special symbols that express your interests or personality.
- Take into account the color of the phone case: To create a unified design, pick a design that complements the color of the phone case.
- Use various engraving techniques: To add diversity and depth to your drawings, consider using line engravings, grayscale engravings, or halftone effects.
- Incorporate pops of color: For a lively appearance, think about using colored phone cases and engraving styles that let the original color show through.
- Draw design inspiration from current trends for a contemporary and fashionable outcome. Keep up of current design trends.
- Test and iterate: Try out several designs, evaluate them on a sample piece, and make necessary corrections to get the desired result.
Personalized phone cases provide a special way to showcase your sense of design and distinguish your phone. You may use laser engraving to make aesthetically pleasing and one-of-a-kind phone cases by following these instructions and applying design advice.
Idea 5: Personalized phone cases
Supplies required
- A laser cutter
- A phone case that may be engraved with.
- Design applications (like CorelDRAW and Adobe Illustrator)
- Safety gear (gloves, safety glasses)
How to engrave a phone case, part B
- Decide on a phone case that works with your laser cutter.
- After measuring the phone case's measurements, make a design template in the design program.
- Create or import the artwork for the phone case that will be engraved.
- Configure your laser engraver using the parameters advised for the phone case's material.
- Make sure the phone case is suitably positioned and insert it into the engraving machine.
- Use the engraving program to preview and modify the design's position and size.
- Start the engraving procedure and closely monitor it to get the depth and level of detail you want.
- After the engraving is finished, take the phone case out of the engraving machine and check the engraving's quality.
- Remove any debris or ink left over from the engraving process by cleaning the phone case.
- Put the phone case on your phone and take pleasure in your personalized design.
Ideas for producing designs that seem good
- Keep it straightforward: Choose simple, minimalist designs that make the most of the small space on a phone case.
- Play with the negative space: To provide contrast and aesthetic appeal, use both etched and unengraved sections.
- Select the appropriate artwork: To ensure clarity and sharpness in the engraving, think about employing vector-based designs or high-resolution photographs.
- Play around with textures: Engrave patterns or textures to give the phone case dimension and a pleasing tactile feel.
- Make it your own by adding initials, names, or other symbols to make the phone case special and representative of you.
- Take color into account: For a unified and coherent appearance, pick a design that goes well with the color of the phone case.
- Experiment with various engraving methods: To give your designs more variation and depth, consider using line engravings, grayscale engravings, or halftone effects.
- Prevent scratches and maintain durability by covering the engraved design with a clear lacquer or protective film.
- Draw inspiration from trends: For a contemporary and fashionable outcome, keep abreast of current design trends and adapt them to meet the phone case structure.
- Experiment with various designs, test them on mockup parts, and make revisions as necessary to get the desired result.
Personalized phone cases are a fun and unique way to express your sense of fashion and uniqueness. You may use laser engraving to make aesthetically beautiful and distinctive phone cases by following these instructions and incorporating design advice.
Idea 6: Personalized Jewelry
Supplies required
- Using a handheld engraving device or a laser
- Items of jewelry (such as necklaces, bracelets, rings, and pendants)
- design applications (like CorelDRAW and Adobe Illustrator)
- protective gear (gloves, safety glasses)
- Optional: cleaning supplies, such as soft cloths and jewelry cleanser
Jewellery engraving techniques
- Based on the size and complexity of the jewelry piece, choose the sort of engraving tool you'll employ.
- To get rid of any oils or residues, properly clean the jewelry piece.
- Using design software or by directly marking the area on the jewelry piece, measure and determine the area for engraving.
4.The pattern you want to engrave on the jewelry item can be created or imported.
5.Set your laser engraver or handheld engraving device up in accordance with the suggested parameters for the particular jewelry piece's material.
- Assure that the jewelry item is stable so that it won't move around while being engraved.
- Using the engraving program or by physically marking the jewelry item, you can preview and modify the design's size and placement.
- Start the engraving process by moving slowly and deliberately to give the engraving the appropriate depth and clarity.
- Once the engraving is finished, check the engraving's quality and, if necessary, clean the jewelry item once more.
- Apply any necessary finishing touches, such as plating or polishing, to improve the engraved jewelry piece's overall appearance.
Ideas for personalizing various types of jewelry
- Name or initials: To create a unique and special piece of jewelry, engrave a person's name or initials.
- Dates and noteworthy events: Commemorate significant dates by engrave them on the jewelry item, such as birthdays, anniversaries, or graduations.
- Quotes or messages: For a more personalized touch, engrave motivational sayings, deep thoughts, or words of support.
- igns and themes: Add symbols or motifs to the jewelry that are special to the wearer, such as hearts, stars, or religious images.
- Create a meaningful piece of jewelry by engraving the coordinates of a specific location, such as a birthplace or a favorite spot.
- Handwriting or signatures: For a really one-of-a-kind and meaningful keepsake, engrave a loved one's handwriting or signature onto a necklace or bracelet.
- Birthstones: Engrave a piece of jewelry with birthstones to commemorate the month of a loved one's birth.
- Create bespoke designs that are representative of the wearer's interests, passions, or hobbies, such as musical notes, sports-related symbols, or nature-inspired motifs.
- Layered engravings: Play around with engraving in different depths or layers to give the jewelry item more depth and complexity.
- Coordinate engravings with gemstones: For a gorgeous and unique piece of jewelry, pair gemstones with etched designs.
People treasure receiving personalized jewelry as gifts because it holds a special place in their hearts. You may engrave jewelry to make it beautiful and meaningful by using the right tools, adhering to engraving procedures, and getting ideas from many personalization alternatives.
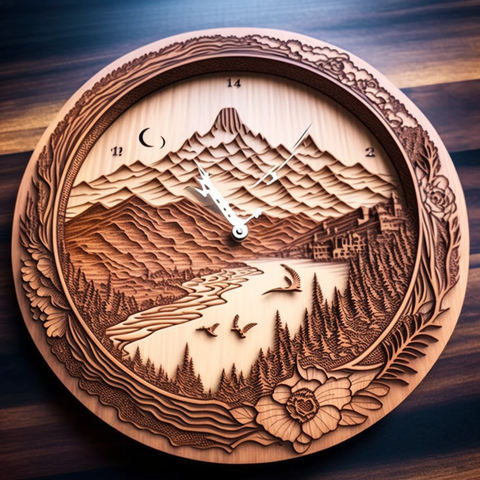
Idea 7: Wall decorations
Supplies required
- A laser cutter
- Wood or sheets of acrylic
- Design applications (like CorelDRAW and Adobe Illustrator)
- Safety gear (gloves, safety glasses)
- Available but not required: paint and brushes
An explanation of how to engrave wall art
- Pick a pattern or image to engrave on the wood or acrylic sheet.
- Import the picture or pattern into the engraving program, then change the settings to optimize the engraving for the material you've chosen.
- Fix the acrylic or wood sheet to the laser engraver.
- Activate the laser engraver and check that the design is positioned properly by previewing it.
- Begin the engraving process and watch it through to completion.
- After the engraving is complete, take the sheet out of the laser engraver and give it a good cleaning.
- Paint the etched area if you'd want to add color or contrast.
Conceptualization ideas for striking wall art
- Inspirational quotes: To bring happiness into your area, engrave inspirational or motivating quotations.
- Nature-inspired patterns: for a peaceful and tranquil atmosphere, engrave natural components like leaves, trees, or flowers.
- Personalized artwork: Use engraving to display your originality and creativity.
- Maps: To add a dash of wanderlust to your walls, engrave a map of your favorite location or metropolis.
- Mandalas or complex designs: To give your place a touch of refinement, engrave mandalas or intricate motifs.
- Silhouettes: To make a one-of-a-kind and simple piece of wall art, engrave silhouettes of things or people.
- Geometric designs: For a sleek, modern appearance, engrave geometric patterns or forms.
- Textures: To give your wall art more depth, engrave various textures like marble or wood grain.
- Customized images: Create a one-of-a-kind piece of wall art by engraving your favorite photos.
- Seasonal designs: To give your home a festive feel, engrave patterns or pictures that correspond to the current season or festival.
Decorative wall art is a wonderful way to give your house or office a unique touch. You may make amazing and striking wall art that expresses your style and individuality by using the proper tools, following the engraving procedure, and getting inspiration from many design alternatives.
Turn Your Ideas into Masterpieces - Find the Top Laser Engravers of 2023 at GearBerry! >>>
Idea 8: Wall art that is decorative
Supplies required
- A laser cutter
- Wood or sheets of acrylic
- Design applications (like CorelDRAW and Adobe Illustrator)
- Safety gear (gloves, safety glasses)
- Available but not required: paint and brushes
An explanation of how to engrave wall art
- Pick a pattern or image to engrave on the wood or acrylic sheet.
- Import the picture or pattern into the engraving program, then change the settings to optimize the engraving for the material you've chosen.
- Fix the acrylic or wood sheet to the laser engraver.
- Activate the laser engraver and check that the design is positioned properly by previewing it.
- Begin the engraving process and watch it through to completion.
- After the engraving is complete, take the sheet out of the laser engraver and give it a good cleaning.
- Paint the etched area if you'd want to add color or contrast
Conceptualization ideas for striking wall art
- Inspirational quotes: To bring happiness into your area, engrave inspirational or motivating quotations.
- Nature-inspired patterns: for a peaceful and tranquil atmosphere, engrave natural components like leaves, trees, or flowers.
- Personalized artwork: Use engraving to display your originality and creativity.
- Maps: To add a dash of wanderlust to your walls, engrave a map of your favorite location or metropolis.
- Mandalas or complex designs: To give your place a touch of refinement, engrave mandalas or intricate motifs.
- Silhouettes: To make a one-of-a-kind and simple piece of wall art, engrave silhouettes of things or people.
- Geometric designs: For a sleek, modern appearance, engrave geometric patterns or forms.
- Textures: To give your wall art more depth, engrave various textures like marble or wood grain.
- Customized images: Create a one-of-a-kind piece of wall art by engraving your favorite photos.
- Seasonal designs: To give your home a festive feel, engrave patterns or pictures that correspond to the current season or festival.
Decorative wall art is a wonderful way to give your house or office a unique touch. You may make amazing and striking wall art that expresses your style and individuality by using the proper tools, following the engraving procedure, and getting inspiration from many design alternatives.
Idea 9: Wall art that is decorative
Supplies required
- A laser cutter
- Wood or sheets of acrylic
- Design applications (like CorelDRAW and Adobe Illustrator)
- Safety gear (gloves, safety glasses)
- Available but not required: paint and brushes
An explanation of how to engrave wall art
- Pick a pattern or image to engrave on the wood or acrylic sheet.
- Import the picture or pattern into the engraving program, then change the settings to optimize the engraving for the material you've chosen.
- Fix the acrylic or wood sheet to the laser engraver.
- Activate the laser engraver and check that the design is positioned properly by previewing it.
- Begin the engraving process and watch it through to completion.
- After the engraving is complete, take the sheet out of the laser engraver and give it a good cleaning.
- Paint the etched area if you'd want to add color or contrast.
Conceptualization ideas for striking wall art
- Inspirational quotes: To bring happiness into your area, engrave inspirational or motivating quotations.
- Nature-inspired patterns: for a peaceful and tranquil atmosphere, engrave natural components like leaves, trees, or flowers.
- Personalized artwork: Use engraving to display your originality and creativity.
- Maps: To add a dash of wanderlust to your walls, engrave a map of your favorite location or metropolis.
- Mandalas or complex designs: To give your place a touch of refinement, engrave mandalas or intricate motifs.
- Silhouettes: To make a one-of-a-kind and simple piece of wall art, engrave silhouettes of things or people.
- Geometric designs: For a sleek, modern appearance, engrave geometric patterns or forms.
- Textures: To give your wall art more depth, engrave various textures like marble or wood grain.
- Customized images: Create a one-of-a-kind piece of wall art by engraving your favorite photos.
- Seasonal designs: To give your home a festive feel, engrave patterns or pictures that correspond to the current season or festival.
Decorative wall art is a wonderful way to give your house or office a unique touch. You may make amazing and striking wall art that expresses your style and individuality by using the proper tools, following the engraving procedure, and getting inspiration from many design alternatives.
Idea 10: The tenth concept is engraved wooden signs
Supplies required
- Laser engraver or handheld engraving tool
- Wood boards or plaques
- Design software (e.g., Adobe Illustrator, CorelDRAW)
- Protective equipment (safety glasses, gloves)
- Optional: Sandpaper or wood stain for finishing touches
The technique for engraving wooden signs step-by-step
1.For the size of your required signs, choose a suitable wood board or plaque.
2.To get rid of any dust or debris, clean the wood surface.
3.Using design tools or by hand, measure and mark the desired engraving area on the wood.
4.You can either draw the image yourself or import it for engraving on the wooden sign.
5.Install your laser engraver or handheld engraving device using the specified wood engraving settings.
6.Make sure the wooden board or plaque is firmly fixed in place so that it won't slide around while being engraved.
7.By directly marking the design on the wood or by using the engraving program to preview and alter its size and position, respectively.
8.Start the engraving process while moving steadily and deliberately to give the engraving the appropriate depth and clarity.
9.After the engraving is finished, check the engraving's quality and re-clean the wood if necessary.
10.For a smoother finish, you might choose sand the wooden sign's edges or surface. To accentuate the wood's inherent beauty, you can also apply stain or sealer.
Inspiration for making rustic or contemporary signs
1.For a rustic and endearing appearance, engrave quotations, proverbs, or family names on salvaged or weathered wood.
2.Natural elements: To add a touch of nature indoors, engrave pictures or silhouettes of trees, leaves, flowers, or animals onto wooden signs.
3.Personalize a wooden sign with the family name, the year it was established, or a kind greeting to make a unique standout piece for your home.
4.Motivating or motivating sayings can be engraved on wooden signs to bring a sense of hope and inspiration to any area.
5.In order to serve as a meaningful reminder, engrave the coordinates of a significant site, such as your home or a beloved area, onto a wooden sign.
6.For a contemporary and sleek appearance, engrave simple, uncomplicated patterns into wooden signs, such as geometric forms or lines.
7.Wedding or event signage: Engrave names, dates, or directional arrows into wood to make personalized wedding or event signs.
8.Business or storefront signage: To make a distinctive and captivating storefront display, engrave your company name, emblem, or motto onto wooden signs.
9.Seasonal or holiday themes: To commemorate particular seasons or holidays all year long, engrave cheery images or sayings onto wooden signage.
10.Custom artwork: To express your artistic creativity and add a personal touch, engrave hand-drawn or digitally generated artwork onto wooden signage.
A flexible and eye-catching approach to decorate your home or give a unique touch to special occasions is to use engraved wooden signage. You can make stunning rustic or modern engraved wooden signage that matches your style and adds warmth to any place by gathering the essential supplies, following the step-by-step instructions, and getting inspiration from design ideas.
Idea 11: Personalized Awards and Trophies
Supplies required
- A laser engraver or other portable engraving device
- Trophies or awards made of crystal, acrylic, glass, or metal
- Design applications (like CorelDRAW and Adobe Illustrator)
- Safety gear (gloves, safety glasses)
Methods for engraving trophies and prizes
- Wipe off any dirt or fingerprints from the trophy or award's surface.
- Using design software or by hand, measure and mark the area to be engraved.
- Create or import the artwork you wish to have engraved on the trophy or award.
- Configure your laser engraver or portable engraving device using the parameters that are suggested for engraving on the particular material.
- Ensure that the trophy or prize is firmly fixed in position to prevent movement while being engraved.
- Using the engraving program or by directly marking the award or trophy, preview and modify the design's position and size.
- Begin the engraving process, moving steadily and deliberately to give the engraving the appropriate depth and clarity.
- Examine the engraving's quality and cleanliness after it has been finished. If necessary, wash the trophy or prize once more.
Ideas for developing enduring designs
- Personalized text: To make an award or trophy truly unique, engrave the event, recipient's name, and title on it.
- Include the organization, business, or event's logo or emblem to strengthen brand identity and create a unified look.
- Achievement details: To give the award a unique touch, engrave specific dates, accomplishments, or achievements that the recipient is being honored for.
- Unique forms or cutouts: Take into account engraving distinctive shapes or cutouts on the trophy or award to go together with the topic or goal of the acknowledgment.
- Incorporate artistic designs, such as swirls, patterns, or themes, to improve the award's or trophy's visual attractiveness.
- Color enhancements: To add color to the engraved sections and highlight significant details, use color fill or infill techniques.
- Multi-material combinations: To create eye-catching and distinctive award designs, combine various materials, such as metal and acrylic or glass and wood.
- 3D engraving: Look into the use of 3D engraving to give the design depth and dimension, enhancing its visual impact.
- Presentation packaging: For a comprehensive and unforgettable presentation, think of combining the customised award or trophy with a specially created box or display case.
- Award or trophy designs based on events or themes can be altered to make them more appropriate and significant for the occasion.
You may recognize and celebrate people or teams in a special and lasting way by making personalized awards and trophies. You may make personalized awards and trophies that the recipients will treasure and enjoy by using the appropriate tools, proper engraving techniques, and intelligent design components.
Idea 12: Create Your Own Trophies and Awards
Supplies required
- A laser engraver or other portable engraving device
- Trophies or awards made of crystal, acrylic, glass, or metal
- Design applications (like CorelDRAW and Adobe Illustrator)
- Safety gear (gloves, safety glasses)
Methods for engraving trophies and prizes
- Wipe off any dirt or fingerprints from the trophy or award's surface.
- Using design software or by hand, measure and mark the area to be engraved.
- Create or import the artwork you wish to have engraved on the trophy or award.
- Configure your laser engraver or portable engraving device using the parameters that are suggested for engraving on the particular material.
- Ensure that the trophy or prize is firmly fixed in position to prevent movement while being engraved.
- Using the engraving program or by directly marking the award or trophy, preview and modify the design's position and size.
- Begin the engraving process, moving steadily and deliberately to give the engraving the appropriate depth and clarity.
- Examine the engraving's quality and cleanliness after it has been finished. If necessary, wash the trophy or prize once more.
Ideas for developing enduring designs
- Personalized text: To make an award or trophy truly unique, engrave the event, recipient's name, and title on it.
- Include the organization, business, or event's logo or emblem to strengthen brand identity and create a unified look.
- Achievement details: To give the award a unique touch, engrave specific dates, accomplishments, or achievements that the recipient is being honored for.
- Unique forms or cutouts: Take into account engraving distinctive shapes or cutouts on the trophy or award to go together with the topic or goal of the acknowledgment.
- Incorporate artistic designs, such as swirls, patterns, or themes, to improve the award's or trophy's visual attractiveness.
- Color enhancements: To add color to the engraved sections and highlight significant details, use color fill or infill techniques.
- Multi-material combinations: To create eye-catching and distinctive award designs, combine various materials, such as metal and acrylic or glass and wood.
- 3D engraving: Look into the use of 3D engraving to give the design depth and dimension, enhancing its visual impact.
- Presentation packaging: For a comprehensive and unforgettable presentation, think of combining the customised award or trophy with a specially created box or display case.
- Award or trophy designs based on events or themes can be altered to make them more appropriate and significant for the occasion.
You may recognize and celebrate people or teams in a special and lasting way by making personalized awards and trophies. You may make personalized awards and trophies that the recipients will treasure and enjoy by using the appropriate tools, proper engraving techniques, and intelligent design components.
Idea 13: Personalized mugs
Supplies required
- A laser engraver or other portable engraving device
- Glasses, tumblers, wine glasses, or water bottles for beverages
- Design applications (like CorelDRAW and Adobe Illustrator)
- Safety gear (gloves, safety glasses)
- Optional finishing touches include sandpaper or shine.
Drinkware engraving techniques
- Wipe the drinkware's surface to remove any debris, oils, or fingerprints.
- Using design software or by hand, measure and mark the area to be engraved.
- Draw the image you want to have engraved on the drinkware yourself or import it.
- Adjust your laser engraver or handheld engraving device to the settings advised for engraving on the particular drinkware material.
- Fix the drinkware in place so that it won't slide around while being engraved.
- Using the engraving program or by directly marking the drinkware, preview and modify the design's position and size.
- Begin the engraving process, moving steadily and deliberately to give the engraving the appropriate depth and clarity.
- Examine the engraving's quality and cleanliness after it has been finished. If necessary, wash the drinkware again.
- You can either clean the engraved drinkware or use sandpaper to smooth out any rough edges to improve the overall finish.
Ideas for original mug, tumbler, etc. designs
- Personalized names or initials: To add a personal touch, engrave the drinkware with the recipient's name, initials, or monogram.
- Quotes or messages: Engrave inspirational sayings, wisecracks, or special messages that relate to the recipient's interests or personality.
- Add aesthetic interest to the drinkware by engraving complicated motifs, patterns, or hand-drawn images that display artistic creativity.
- Logo or branding: For promotional or commemorative purposes, engrave business logos, sports team logos, or event branding onto drinkware.
- Nature-inspired motifs: To add a hint of nature to the drinkware design, engrave flower designs, leaves, animals, or natural landscapes.
- Personalized themes: Engrave drinkware with motifs that are representative of the recipient's pastimes, interests, or favorite fandoms, such as music, books, movies, or sports.
- Special events: Create drinkware with graphics that honor particular occasions or holidays, such as weddings, birthdays, anniversaries, or holidays.
- Photo engravings: To make a truly special and heartfelt gift, engrave pictures or silhouettes of beloved people, animals, or special moments into the drinkware.
- Geometric patterns: To give the drinkware design a contemporary and elegant touch, engrave geometric patterns such as mandalas or tessellations.
- Color infill: When engraving and color infill techniques are used together, brilliant colors or accents can be added to the engraved designs to produce vibrant and eye-catching drinkware.
A unique and personalized way to enjoy beverages and show off your individuality is with custom drinkware. You may produce custom engraved drinkware that is not only useful but also aesthetically pleasing and significant to the receiver by making use of the necessary tools, using proper engraving techniques, and getting inspiration from original design ideas.
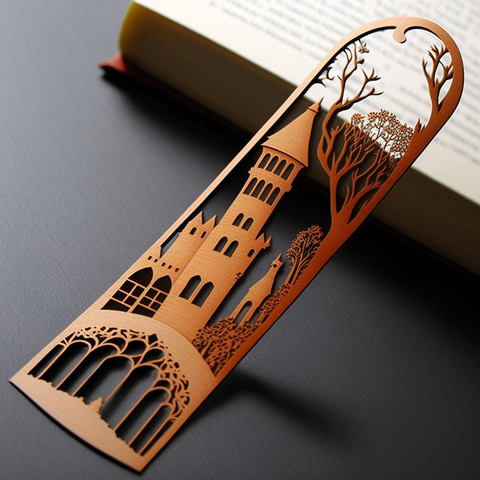
Idea 14: Bookmarks with engraving
Supplies required
- A laser engraver or other portable engraving device
- Bookmark blanks made of leather, acrylic, wood, or metal
- Design applications (like CorelDRAW and Adobe Illustrator)
- Safety gear (gloves, safety glasses)
- Optional finishing touches include sandpaper or shine.
Detailed instructions for etching bookmarks
- Make sure the blank bookmark is dust- and debris-free by cleaning the surface.
- Using design software or by hand, measure and mark the area to be engraved.
- Draw the image you wish to have engraved on the bookmark, or import one.
- Adjust your laser engraver or handheld engraving device to the settings advised for engraving on the particular bookmark material.
- Ensure that the bookmark blank is firmly fixed in position so that it won't move during engraving.
- Using the engraving program or by directly marking the bookmark, preview and modify the design's position and size.
- Begin the engraving process, moving steadily and deliberately to give the engraving the appropriate depth and clarity.
- Examine the engraving's quality and cleanliness after it has been finished. If necessary, wash the bookmark once more.
- You can choose polish the engraved bookmark or use sandpaper to smooth out any rough edges to improve the overall finish.
Ideas for stylish and useful bookmark designs
- Literary passages or inspirational phrases: Inscribe thought-provoking quotes from favorite novels, poems, or writers to motivate readers each time they pick up the book.
- Personalized names or initials: To add a personal touch, engrave the bookmark with the recipient's name, initials, or monogram.
- Designs inspired by nature: To add a sense of tranquility and nature to the bookmark design, engrave floral patterns, leaves, trees, or animals.
- Geometric designs: To make visually attractive and contemporary bookmarks, engrave complex geometric patterns such as mandalas or tessellations.
- Book-related emblems or symbols: To give the bookmark a bookish flair, engrave pictures of books, quills, reading glasses, or other symbols connected to literature.
- Personalized illustrations: Incorporate hand-drawn images of the recipient's favorite people, places, things, or scenes into the engraving.
- Memorable dates: Inscribe memorable dates on the item, such as the recipient's birthday, anniversary, or other significant event.
- Minimalistic patterns: For a sleek and modern appearance, engrave basic and tasteful patterns like lines, dots, or patterns.
- Layered designs: To add depth and texture to the bookmark design, experiment with layering different materials or engravings.
- Motivating symbols: Use symbols like hearts, stars, feathers, or infinity signs to motivate the reader and elicit good feelings.
In addition to being useful tools for marking pages, personalized bookmarks make considerate presents and enhance the reading experience. You may make beautiful and distinctive bookmarks that readers will treasure as they dip into the pages of their favorite books by adhering to the step-by-step engraving method and taking design recommendations into account.
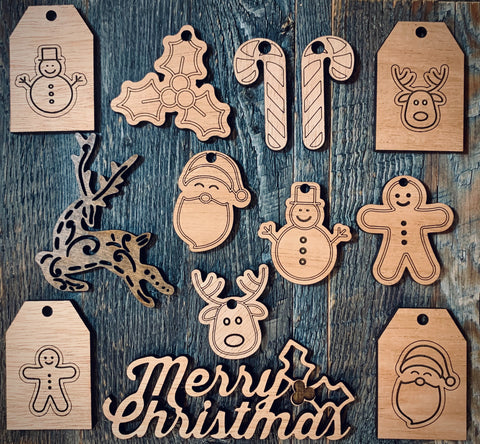
Idea 15: Customized Engraved Presents
Supplies required
- A laser engraver or other portable engraving device
- Gifts made of materials that can be engraved, such as leather, glass, metal, and acrylic.
- Design applications (like CorelDRAW and Adobe Illustrator)
- Safety gear (gloves, safety glasses)
- Optional finishing touches include sandpaper or shine.
Advice on choosing the ideal gift item to engrave
- Take into account the recipient's hobbies and interests: Pick a present that fits the recipient's interests, such as sports, music, cuisine, or the arts. The engraving will become even more important thanks to this unique touch.
- Choose an appropriate material: Make sure the gift item's substance is compatible with engraving procedures. Wood, metal, glass, acrylic, and leather are typical materials. Every material has different qualities and engraving outcomes.
- Think about the situation: No matter the occasion—a birthday, an anniversary, a graduation, a wedding, or a holiday—tailor the gift to fit the bill. This will assist you in selecting a suitable gift that has meaning for the recipient.
- Quality and durability: Pick a gift that is both high-quality and long-lasting to make sure it will be used for many years to come. Select materials whose integrity won't be compromised by the engraving procedure.
Suggestions for customizing gifts for different occasions
- For thoughtful and long-lasting wedding gifts, engrave the couple's names, wedding date, and a touching message on picture frames, champagne flutes, or cutting boards.
- To celebrate the couple's love and years of marriage, personalize a piece of jewelry, a watch, or a decorative object with their names, the date of their anniversary, and a sweet message.
- Birthday presents: To make a particular and memorable birthday gift, engrave a special message, the recipient's name, or their birthdate on jewelry, a pen, or a personalized wooden plaque.
- For graduation presents, personalize a keychain, a notebook, or a portfolio with the graduate's name, the year of graduation, and a motivational saying to honor their accomplishment and offer support for their future goals.
- Baby shower presents: To make a treasured gift that encapsulates the thrill of welcome a new life, engrave a baby's name, birthdate, or a loving message on a silver spoon, a wooden memory box, or a baby's first Christmas ornament.
- Retirement presents: To thank the retiree for their years of service and wish them well in their next chapter, engrave a special message, their name, or a memorable phrase on a watch, a plaque, or a set of whiskey glasses.
- To commemorate and enhance the link between friends, engrave a friendship bracelet, keychain, or necklace with a special symbol, personal message, or both.
- Thank-you gifts: Express gratitude with a sincere note or the recipient's name on an engraved pen, a personalized cutting board, or a wine glass.
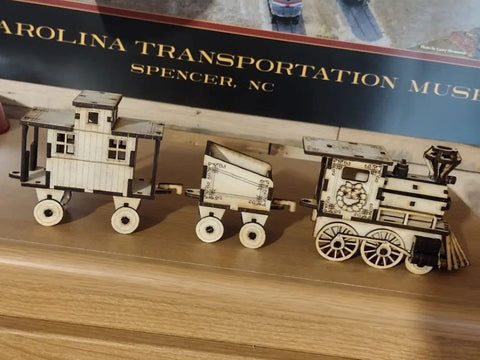
By considering the recipient's interests, selecting a suitable gift item, and adding your own engraving with the LONGER RAY 5 (Laser Engraver), you may create meaningful and one-of-a-kind presents for a range of occasions. High-quality laser engraving equipment like the LONGER RAY 5 provides accuracy, adaptability, and user-friendly operation. With its sophisticated features and strong laser capabilities, you can quickly and easily add intricate designs and decorations to gifts. The engraved addition made with the LONGER RAY 5 will be treasured by the recipient as a unique and personalized touch for many years to come.
Gearberry Black Friday Sale Early!
Gearberry is excited to announce our early Black Friday sale, packed with incredible deals and exciting offers. Get ready to save big and win amazing prizes!
Part 1: 100% Winning! Save up to $1099!
Starting November 14th, all GearBerry owners can enter our Spin the Wheel game for a chance to win awesome prizes worth up to $1090. Totally free! Plus, you can get $10, $20, $30 or $40 off.
To participate, simply enter your email address between November 14 and November 30. Visit our Spin the Wheel game and try your luck at winning valuable items and coupons. Don't miss this chance to spin and win big!
Part 2: Early Black Friday Sale 50% Off Flash Sale
Right now, you can get up to 50% off on select items. Take advantage of this incredible offer and get your favorite products at half price. We have discount categories on engraving machines, 3D printers, power tools, and more. Remember, first come, first served!
Part 3: Early Black Friday Sale Brand Promotions
Explore our exclusive page featuring discounted products and special bundle offers. This is your chance to get the best deals on your favorite brands. Take advantage of markdowns and upgrade your gear at unbeatable discounts.
Part 4: The Best Gear on Gearberry! Up to 70% off + save an extra $50 with coupon!
We're taking discounts to the next level! Buy now and save up to 70% on most products. But that's not all. You can save even more with our coupon codes. Get $10 off orders over $100, $30 off orders over $300, and $50 off orders over $500. Stack these discounts and let your savings keep growing!
Part 5: Best Sellers, Up to 70% Off
In this section you will find a variety of products with discounts of up to 70%. From laser engravers to electronics, we have everything you need at unbeatable prices. Don’t miss out on these incredible deals to upgrade your devices and gadgets without breaking the bank.
Part 6: Buy More, Save More! Accessories up to 20% off!
Discover our exclusive collection of accessories and take advantage of great discounts during our Black Friday sale, which starts on November 14th. Buy any 2 accessories and get 10% off, buy 3 accessories and get 20% off. This is a great opportunity to upgrade your accessory collection while saving money.
Gearberry's early Black Friday sale is one you don't want to miss. Mark your calendars and get ready to enjoy unbeatable offers, exciting prizes and huge savings. Start shopping and enjoy the best Gearberry has to offer!
Conclusion
We have looked at a range of beginner-friendly laser engraving options in this article. We have covered a wide range of imaginative possibilities, from engraved glassware and personalized jewelry to personalized keychains and wooden coasters. We also looked into concepts like personalized drinkware, engraved bookmarks, engraved leather accessories, engraved pens, personalized awards and trophies, engraved photo frames, and personalized engraved gifts for different occasions.
Getting started with laser engraving brings up a world of creativity and self-expression. Remember that engraving is designed to be a fun and gratifying process, regardless of your level of skill. Don't be scared to try new things, experiment, and allow your imagination run wild. The ability to personalize and meaningfully produce gifts or ornamental goods using laser engraving is a rare opportunity. A reputable business in the sector, GearBerry provides a variety of engraving tools and supplies to help you realize your original ideas. GearBerry is committed to giving you the tools and resources you need to produce professional outcomes in your laser engraving projects because they are committed to quality and client happiness. And we provide laser engraver buying guide,if you have any question, just search our website.
So, let your imagination go wild, explore the realm of laser engraving, and delight in the process of transforming ordinary items into gorgeous, unique works of art. Laser engraving presents countless options to showcase your artistic talent, whether you're making gifts for loved ones, personalizing your possessions, or beginning a small business.


